You go to access a service and get blocked with no explanation. Or your emails suddenly start bouncing. A blacklisted IP is often the cause — and most IP reputation problems are inherited rather than earned. Your ISP recycled an address that belonged to a spammer. The blacklisting stuck. Here is how to check and fix it, free.
When an IP Address Gets Banned, the Problem Is Rarely What You Think
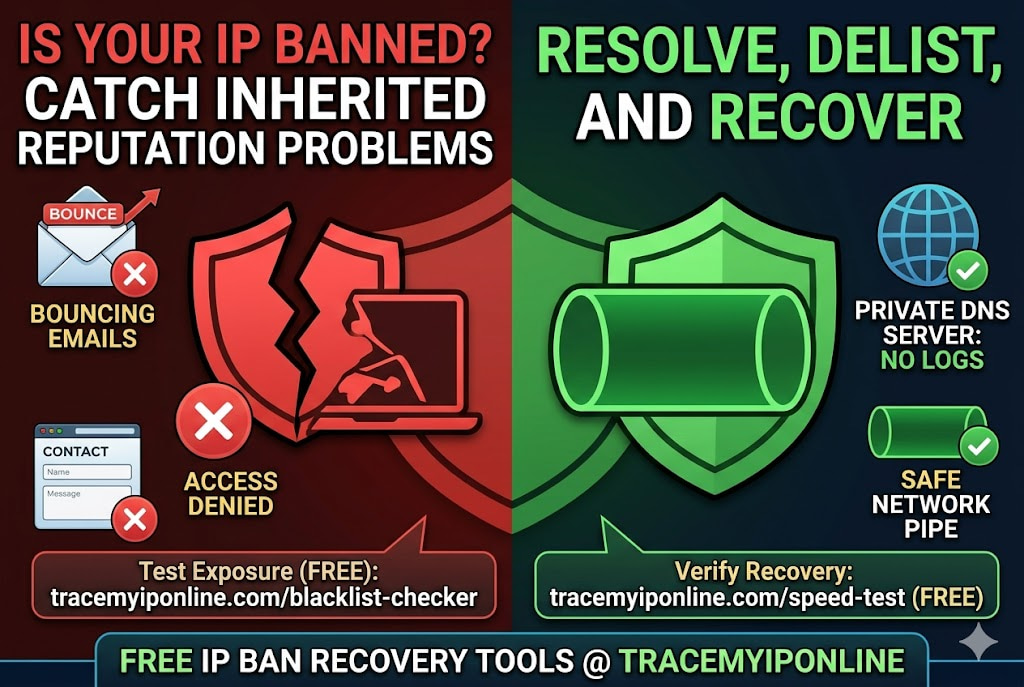
You go to log into a service or visit a website and get an access denied message. No explanation. Just blocked. Or your emails suddenly start bouncing from certain providers. Or a form submission keeps failing silently.
IP bans are often invisible — many services do not tell you that it is your IP causing the problem. You might spend an hour troubleshooting login credentials, browser issues, or account status before realizing your IP address is the issue.
Check your IP's current reputation and blacklist status free at tracemyiponline.com/blacklist-checker — no account needed.
"Most IP reputation problems are inherited rather than earned. A residential user whose ISP recycles dynamic IPs may get assigned an address that was previously used by someone sending spam. They have never sent a single spam email in their life, but their new IP is on three blacklists from its previous owner's activity. This is one of the more frustrating aspects of shared dynamic IP systems — and checking blacklist status is the first step to identifying and resolving it."
— Petra Novak, Email Deliverability Engineer, MailOps Consulting Group
Why Your IP Address Gets Banned — The Actual Causes
Previous owner's behavior (inherited reputation): Dynamic IP addresses are recycled. Your current IP may have belonged to a different customer last month — one who ran a spam operation, participated in a botnet, or engaged in port scanning. The blacklisting sticks to the IP, not the person. When your ISP assigned you that IP, you inherited its history. This is the most common cause of unexplained IP reputation problems for ordinary users.
Malware on your network: Devices compromised by malware often send spam, participate in DDoS attacks, or scan for vulnerable systems — all without the device owner's knowledge. This activity gets your IP flagged. The behavior happens in the background while you use the device normally. Signs include unusually high router traffic, ISP warnings, or sudden appearance on blacklists.
Shared hosting neighbors: If you host a website on shared hosting, your IP is shared with potentially hundreds of other sites. If any of your hosting neighbors run spam campaigns or get compromised, the shared IP gets blacklisted. Your site had nothing to do with it, but you share the consequence.
False positives from automated systems: Some IP reputation systems flag IPs aggressively on limited evidence. A single spam report, an unusual connection pattern, or association with a network range that has had issues can result in a flag. These are not always accurate and can affect clean IPs.
Rate limiting and access control: Some bans are not about reputation — they are about behavior. Too many failed login attempts, too many requests in a short period, or patterns that look like scraping can trigger access bans from specific services. These are policy-based blocks rather than reputation-based blacklistings.
How to Check If Your IP Is Banned or Blacklisted
For email deliverability problems and reputation checks:
Visit tracemyiponline.com/blacklist-checker. Your current IP is auto-detected, or you can enter any IP manually. The tool checks against major blacklist databases — Spamhaus, SORBS, SpamCop, Barracuda, and others — and shows which lists your IP appears on, if any.
For website or service access blocks: these are usually service-specific rather than blacklist-based. The service has blocked your IP in its own access control system. A blacklist check will show clean, but the block exists in the service's own infrastructure. In this case, changing your IP (see below) or contacting the service's support is the path forward.
For a complete picture: combine the blacklist check with an IP lookup at tracemyiponline.com/ip-lookup to see your IP's full profile including ASN, connection type, and whether it is classified as residential or datacenter.
Before vs After: Email Deliverability Impact of a Blacklisted IP
Small business email campaign — 3,000 recipients, before blacklist check: Sent: 3,000. Bounced immediately: 847 (28%). Delivered to spam folder: 1,200 (40%). Delivered to inbox: 953 (32%). Revenue attributed: $1,400.
Blacklist check result: IP appeared on Spamhaus SBL (Spamhaus Block List) and Barracuda Reputation Block List. Root cause: IP was previously assigned to a customer who ran a spam operation before the ISP terminated their account. The IP was recycled without being cleaned from blacklists.
Same campaign after successful delisting (Spamhaus and Barracuda removal, took 48 hours): Sent: 3,000. Bounced: 62 (2%). Delivered to spam: 180 (6%). Delivered to inbox: 2,758 (92%). Revenue attributed: $8,200.
The same list, the same content, the same product. The only difference was the IP reputation. Check yours at tracemyiponline.com/blacklist-checker.
How to Get Your IP Removed From Blacklists
The process varies by blacklist, but the general sequence is the same: identify the root cause, resolve it, then request removal.
Step 1 — Identify which blacklists: Run the check at tracemyiponline.com/blacklist-checker. Note every blacklist where your IP appears. Each requires a separate removal request.
Step 2 — Find the reason: Most blacklist removal pages tell you why the IP was listed — spam source, open relay, malware distribution, port scanning. If your own activity did not cause it, check for malware on devices using that IP, check your open ports at tracemyiponline.com/port-checker, and verify no devices on your network are behaving unexpectedly.
Step 3 — Submit removal requests:
Spamhaus (the most important to delist from): Visit spamhaus.org and navigate to their removal center. Spamhaus distinguishes between automated removal (for IPs that have stopped the problematic activity) and assisted removal (for complex cases). Most residential IPs with inherited reputation problems can use automated removal.
Barracuda: Visit barracudacentral.org/rbl/removal. Fill in the IP and submit the form. Barracuda reviews and typically processes within 12-24 hours for clean IPs.
SORBS: Visit sorbs.net. SORBS removal can be more involved — they sometimes require verification from the ISP. If your ISP has a postmaster contact, involving them speeds the process.
SpamCop: SpamCop listings expire automatically after 24-48 hours if the problematic activity stops. Manual removal requests are generally not needed unless you are specifically on the SCBL (SpamCop Block List) for ongoing activity.
Step 4 — Wait and verify: Most removals take 24-72 hours to propagate. After the stated processing time, recheck at tracemyiponline.com/blacklist-checker to confirm the IP no longer appears on the relevant lists.
How to Change Your IP Address to Escape a Ban
Sometimes delisting takes time you do not have, or a service has banned your IP directly (not via a third-party blacklist) and will not remove it. Changing your IP is the faster path in these cases.
Restart your router: For most home broadband connections with dynamic IP addresses, turning off your router for 30-60 seconds and restarting assigns a new IP from your ISP's pool. This is instant and costs nothing. Verify the change at tracemyiponline.com/ip-lookup after reconnecting. Note: some ISPs assign the same IP back, particularly if the lease has not expired.
Contact your ISP: Ask explicitly for a new IP address. ISPs can do this in minutes — explain that your current IP has a reputation problem and you need it changed. Most ISPs will accommodate a single change request without issue.
Use a VPN: A VPN gives you a different IP — the VPN server's IP — immediately. This is useful for accessing services that have blocked your home IP. Be aware that VPN datacenter IPs are themselves often blocked by services that do not allow VPN access. Test whether the VPN IP is clean using our Blacklist Checker before relying on it.
Switch to mobile data: Your cellular connection uses a completely different IP from your home ISP. Useful for testing whether a specific service block is IP-based: if it works on mobile data, your home IP is the issue.
For California and New York Email Marketers
California and New York are home to enormous email marketing operations — e-commerce, SaaS, publishing, and financial services all rely heavily on email revenue. Under CCPA and CAN-SPAM, email practices must comply with consent and opt-out requirements. But technically compliant email can still fail to reach inboxes if the sending IP is blacklisted.
IP reputation monitoring should be part of any serious California or New York email program. Weekly blacklist checks at tracemyiponline.com/blacklist-checker — particularly for dedicated sending IPs — can catch reputation problems before they silently destroy campaign performance. Combine with DNS authentication checks at our DNS Lookup to verify SPF, DKIM, and DMARC records are correctly configured.
For London and UK Email Senders
UK GDPR and PECR (Privacy and Electronic Communications Regulations) govern commercial email from UK businesses. Compliance with these regulations is necessary but not sufficient for inbox delivery — IP reputation is a parallel requirement that operates entirely outside the legal framework.
BT, Sky, and Virgin Media residential IPs are subject to the same blacklisting risks as US residential IPs. UK businesses sending from shared hosting should verify their sending IP's reputation regularly. Check at tracemyiponline.com/blacklist-checker and verify your domain's email authentication at our DNS Lookup.
For Toronto and Ontario Businesses
CASL compliance is mandatory for Canadian commercial email, and CASL penalties are among the highest globally — up to CAD $10 million per violation. An IP blacklisting problem that prevents your emails from reaching recipients does not reduce your CASL compliance exposure — you are still legally responsible for the emails sent even if they do not arrive. Address IP reputation issues proactively at tracemyiponline.com/blacklist-checker.
For Sydney and Australian Businesses
Australia's Spam Act 2003 requires commercial messages to include functional unsubscribe mechanisms and be sent only with consent. Like CASL, legal compliance does not prevent IP-based delivery failures. Australian businesses using dedicated email infrastructure — particularly those migrating from shared to dedicated hosting — should check their sending IP's reputation before the first major campaign. Run the check at tracemyiponline.com/blacklist-checker.
Frequently Asked Questions
Is the blacklist checker completely free?
Yes — 100% free, no signup, no limits. Visit tracemyiponline.com/blacklist-checker and check any IP's reputation instantly.
How long does it take to get off a blacklist?
SpamCop: 24-48 hours automatic expiry if activity stops. Spamhaus: 24-72 hours after successful removal request. Barracuda: typically 12-24 hours. SORBS: varies, sometimes requires ISP involvement. URIBL and similar: can take a week or longer for complex cases.
Can I be blacklisted for things other than spam?
Yes — open mail relays, port scanning, malware distribution, participation in DDoS attacks, and other network abuse all result in blacklisting. The specific list that flags you indicates the reason. Security-focused lists like the Spamhaus PBL (Policy Block List) list entire IP ranges (like dynamic residential ranges) by default — these are not abuse-based and have straightforward removal processes.
My IP is clean but emails still go to spam — why?
Domain reputation is separate from IP reputation. Even with a clean IP, a domain with poor sending history, low engagement rates, or missing authentication records (SPF, DKIM, DMARC) will send mail to spam folders. Check your domain's DNS authentication records at tracemyiponline.com/dns-lookup.
Does a VPN IP get blacklisted more often than residential IPs?
Often yes — VPN datacenter IPs are shared among many users, including some who use them for spam or scanning. Many VPN IP ranges appear on spam blacklists despite the VPN provider's legitimate business. This is one reason why business email should not route through VPN connections. Check any IP's reputation at tracemyiponline.com/blacklist-checker.
My IP was delisted but was blacklisted again quickly — what is happening?
Re-listing quickly after removal almost always means the root cause was not resolved. If malware on your network is still active, it continues the behavior that caused the original listing. If a compromised mail server is still sending spam, it will be re-listed. Resolve the underlying cause — close the vulnerable port at tracemyiponline.com/port-checker, remove malware, secure the mail server — before requesting removal.
The Reputation Problem You Did Not Create
Most IP reputation problems are inherited, not earned. The ISP recycled an address. The shared hosting neighbor went rogue. The previous tenant of your cloud IP range had bad habits. None of it is your fault — but it affects you until you identify it and fix it.
Five minutes with a blacklist checker tells you whether you have a problem. Resolving it usually takes 24-72 hours once you know where the listing is and what caused it.
Check your IP's current reputation at tracemyiponline.com/blacklist-checker. Look at your full IP profile at tracemyiponline.com/ip-lookup. Check your domain's email authentication at tracemyiponline.com/dns-lookup. All free at TraceMyIPOnline.com.